17
- Tag Dream

Obrigada AsD por autorizar a
tradução
Tube
feminino e Wordart de Yoka
Masks de TDstudio & Ildiko
Frame e Background Image de TDstudio
Plugins:
- Filters Unlimited 2.0
Harry's Button Tools - Prisma Button (importar pelo
Unlimited)
VanDerLee - Unplugged X - Jalusi
It@lian Editors Effect - Effetto Fantasma
Abra
a imagem a mask e os tubes no Psp e os minimize.
NOTA:
Se estiver usando outras cores, colorize os materiais
Coloque
a seleção na pasta de Seleções
Cores
usdas: "ffffff; #3b3e71; #000000; #ebeadb
Coloque
no Foreground a cor #ffffff
Coloque
no Background a cor #3b3e71
01
Maximize
a Imagem "@nn_280615_bg_tdstudio"
Window / Duplicate (or shift+D) - Feche a
original, usaremos a cópia
Adjust / Blur / Gaussian Blur /
radius 25
02
Layers / New Raster Layer
Selections - Select All
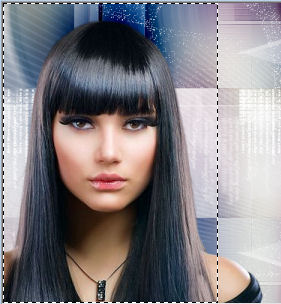
Maximize o Tube
"Yoka-LadyBlackHair-301216"
Edit /
Copy
Minimize
para usar depois
Edit / Paste Into Selection na imagem
Selections / Select None
Adjust / Blur / Radial Blur

Layers / New Mask Layer / From
Image / localize a mask @nn_23113_mask_320_tdstudio

Effects / Edge Effects / Enhance
Layers / Merge / Merge Group
03
Layers /
Duplicate
Image /
Mirror - Mirror Vertical ( Image / Flip em versões anteriores do PSP)
Layers /
Merge / Merge Down
Mude
o Blend mode para "Burn" e baixe a opacidade para 85 ( Se usar
outras cores talvez precise usar outro blend mode)
Layers /
Merge / Merge Visible
O
trabalho estará assim:

04
Ative a Selection Tool / Rectangle /
Custom Selection: Top 143 / Left 0 / Bottom 357 / Right 900
Selections / Promote Selection to Layer
Selections / Select None
Effects / Distortion Effects / Spiky Halo

Mude
o Blend Mode para "Soft Light" e baixe a opacidade para 65
05
Ative a layer debaixo
Ative a Selection Tool / Rectangle /
Custom Selection: Top 143 / Left 0 / Bottom 357 / Right 358
Selections / Promote Selection to Layer
Selections / Select None
Layers / Arrange / Bring to Top
Effects / Plugins / -
Filters Unlimited 2.0 / Harry's Button Tools / Prisma Button /
Default

Ative
a varinha mágica / Mode: Add /Shift / Tolerance 0 /
Contiguous marcado / Anti Alias marcado Clique na área
cinza lateral:

Edit / Cut (Ou apertet a
tecla Delete)
Selections / Select None
06
Image /
Free Rotate / Left marcado - 90° - Caixinhas debaixo
desmarcadas
Effects / Image Effects / Offset:
Horizontal= -50 / Vertical= 74 / Transparent marcado
Layers /
Duplicate
Image /
Mirror - Mirror Horizontal ( Image / Mirror em versões anteriores)
Image /
Mirror - Mirror Vertical ( Image / Flip em versões anteriores)
Layers / Merge / Merge Down
Effects / Image Effects / Seamless Tiling

Effects / Edge Effects / Enhance
Effects / 3D Effects / Drop
Shadow: 0 / 0 / 80 / 40 - Cor #000000
Mude
o Blend Mode para "Overlay" e baixe a opacidade
para 75
07
Ative
a layer abaixo de todas
Ative a Selection Tool / Rectangle /
Custom Selection: Top 36 / Left 358 / Bottom 139 /
Right 685
Selections / Promote Selection to Layer
Layers / Arrange / Bring to Top
Mantenha selecionado
Effects / Plugins / / Filters Unlimited 2.0 / Harry's Button Tools /
Prisma Button / Default

Selections /
Select None
Ative
a varinha mágica / Mode: Add /Shift / Tolerance 0 /
Contiguous marcado / Anti Alias marcado - Clique na
área cinza em torno do losango:

Edit /
Cut (Ou aperte a tecla Delete)
Selections / Select None
08
Edit / Copy
Edit / Paste as New Image
Salve como
PSP file e minimize na área de trabalho
09
Volte para a imagem principal
Image / Resize / 85% - Resize all Layers
desmarcado
Effects / Image Effects / Offset:
Horizontal= 11 / Vertical= 27 / Transparent marcado
Layers / Duplicate
Image /
Mirror - Mirror Vertical ( Image / Flip em versões anteriores)
Layers / Merge / Merge Down
Mude o Blend Mode para "Soft
Light"
10
Layers / New Raster Layer
Ative a Selection Tool / Rectangle /
Custom Selection: Top 143 / Left 0 / Bottom 357 /
Right 900
Maximize o Tube
"ASDwebs_Deco_Dream_1"
Edit / Copy
Edit Paste Into Selection na imagem
Selections / Select None
Mude o Blend Mode para "Screen"
11
Layers / New Raster Layer
Pinte com a cor do Foreground
Layers / New Mask Layer / From Image -
localize a mask ildiko_create_0001_free_mask_2016_02_02

Layers / Duplicate
Repita o Layers / Duplicate
Layers / Merge / Merge Group
Ative a Selection Tool / Rectangle /
Custom Selection: Top 143 / Left 0 / Bottom 357 /
Right 900
Edit /
Cut (Ou aperte a tecla Delete)
Selections /
Select None
Mude
o Blend Mode para "Dissolve" e mude a opacidade para 15
12
Layers / New Raster Layer
Ative a Selection Tool / Rectangle /
Custom Selection: Top 0 / Left 663 / Bottom 500 /
Right 700
Pinte
a seleção com a cor do Background
Effects / Plugins / VanDerLee /
Unplugged X / Jalusi / Blind amount em 65 / Blind color - Background
/ Transparency 50

Selections / Select None
Layers / Duplicate
Effects / Plugins / It@lian Editors
Effect / Effetto Fantasma / Sposta- X 16 - Sposta Y 16
Layers / Arrange Move Down
Ative a layer do topo
Effects / Edge Effects / Enhance
Effects / 3D Effects / Drop Shadow: 0 /
0 / 50 / 30 - Cor - #000000
Layers / Merge / Merge Down
13
Ative a Selection Tool / Rectangle /
Custom Selection: Top 0 / Left 0 / Bottom 500 /
Right 357
Maximize o Tube "Yoka-LadyBlackHair-301216"
Edit /
Copy
Minimize,
vai usá-lo depois
Edit / Paste As New Layer na imagem
Image / Resize / 120% - Resize all Layers
desmarcado
Mova
na seleção como no modelo:
Selections / Invert
Edit / Cut (Ou aperte a tecla Delete)
Selections / Select None
Adjust / Sharpness / Sharpen
Mude o Blend Mode para "Soft
Light"
Layers /
Merge / Merge Visible
Salve
seu trabalho e minimize no Psp.
14
Maximize
o Tube "@nn_201012_Frame1"
Window /
Duplicate (or shift+D) - Feche o original, trabalharemos na cópia
Ative a Selection Tool / Rectangle /
Custom Selection: Top 35 / Left 36 / Bottom 162 /
Right 155
Maximize o Tube "Yoka-LadyBlackHair-301216"
Edit / Copy
Minimize no psp
Na Frame: Edit / Paste As New Layer
Image / Resize / 95% - Resize all Layers
desmarcado
Mova
a Face na Selection assim:

Selections / Invert
Edit / Cut
Selections / Select None
Layers / Arrange / Move Down
15
Maximize a Imagem feita no item 8 (o
losango)
Image / Resize / 20% - Resize all Layers
desmarcado
Edit / Copy
Minimize
novamente no psp e mantenha a imagem reduzida
Na Frame:
Edit / Paste As New Layer
Layers / Arrange / Move Up
Effects / Image Effects / Offset:
Horizontal= 0 / Vertical= 85 / Transparent marcado
Effects / 3D Effects / Drop Shadow:
1 / 1 / 50 / 8 - Cor - #000000
16
Layers / Duplicate
Effects / Image Effects / Offset: Horizontal=
0 / Vertical= -170 / Transparent marcado
Layers /
Duplicate
Image /
Free Rotate / Left marcado - 90° / os 2 quadrinhos debaixo
desmarcados
Effects / Image Effects / Offset:
Horizontal -83 / Vertical= 83 / Transparent marcado
Layers /
Duplicate
Image /
Mirror - Mirror Horizontal ( Image / Mirror em versões anteriores)
Image / Add Borders / Symmetric / 1
px - #000000
Resultado:

Edit /
Copy!
17
Maximize
sua imagem original
Edit / Paste As New Layer
Image / Resize - 85% / Resize all Layers
desmarcado
Effects / Image Effects / Offset:
Horizontal= 230 / Vertical= 120 / Transparent marcado
18
Layers / Duplicate
Effects / Image Effects / Offset:
Horizontal= 0 / Vertical= -245 / Transparent marcado
Layers / Merge / Merge Down
19
Layers / Duplicate
Layers / Arrange / Move Down
Effects / 3D Effects / Drop
Shadow: 0 / -50 / 50 / 5 - Cor - #ffffff
Effects / 3D Effects / Drop
Shadow: 0 / 50 / 50 / 5 - Cor - #ffffff
Effects / Texture Effects / Blinds: 3 /
80 Cor #3b3e71 / Horizontal e Light from left/top marcados

Adjust / Sharpness / Sharpen
Ative a layer do topo
Effects / 3D Effects / Drop
Shadow: 0 / 0 / 80 / 40 - Cor -
#000000
20
Mude o Foreground para a cor #ebeadb
Layers / New Raster Layer
Selections / Load/Save Selection / Load
Selection From Disk / localize a seleção ASDwebs_Sel_#484

Pinte
a seleção com a cor do Foreground
Selections / Select None
Layers / Duplicate
Image / Mirror - Mirror Vertical (
Image / Flip em versões anteriores)
Layers / Merge / Merge Down
Effects / 3D Effects / Drop Shadow: 0
/ 0 / 80 / 40 - Cor - #000000
21
Maximize
o Tube "ASDwebs_Deco_Dream_2"
Edit /
Copy
Edit /
Paste As New Layer na imagem
Effects /
Image Effects / Offset: Horizontal= -284 / Vertical= 176
/ Transparent marcado
Layers / Duplicate
Effects /
Image Effects / Offset: Horizontal= 0 / Vertical= -358
/ Transparent marcado
22
Maximize
o Tube "ASDwebs_Deco_Dream_3"
Edit /
Copy
Edit /
Paste As New Layer na imagem
Effects /
Image Effects / Offset: Horizontal= 227 /
Vertical= 123 / Transparent marcado
Layers /
Duplicate
Effects /
Image Effects / Offset: Horizontal= 0 / Vertical= -245
/ Transparent marcado
23
Maximize
o Tube "Yoka-TEXT-DREAM161016"
Edit /
Copy
Edit /
Paste As New Layer na imagem
Selections / Select All
Selections / Float
Selections / Defloat
Edit / Cut
Pinte com
a cor do Background #3b3e71
Selections / Select None
Effects / Image Effects / Offset
Horizontal= -104 / Vertical= -46 / Transparent marcado
Effects /
3D Effects / Drop Shadow: 2 / 2 / 50
/ 8 - Cor - #000000
24
Image /
Add Borders / Symmetric / 1 px - #3b3e71
Selections /
Select All
Image /
Add Borders / Symmetric / 50 px - #ebeadb
Effects /
3D Effects / Drop Shadow: 0 / 0 / 80
/ 40 - Cor - #3b3e71
Selections / Select None
25
Maximize a Imagem minimizada
no item 8 e minimizada novamente no item 13 (losango)

Edit /
Copy .
Edit -
Paste As New Layer
Effects /
Image Effects / Offset: Horizontal= 449 / Vertical= 106
/ Transparent marcado
Layers /
Duplicate
Effects /
Image Effects / Offset: Horizontal= 0 / Vertical= -212 /
Transparent marcado
Layers /
Merge / Merge Down
Layers /
Duplicate
Effects /
Image Effects / Offset: Horizontal= -899 / Vertical= 0
/ Transparent marcado
Layers /
Merge / Merge Down
Adjust /
Sharpness / Sharpen
26
Image / Add Borders - Symmetric / 1 px - #3b3e71
Image /
Resize / Width 900 Pixels / Resize all Layers marcado
Assine e Salve como Jpeg
Nenhum comentário:
Postar um comentário