
Eye Candy 5 Impact /
/ L & K / Elvida
BKG Kaleidoscope / / BKG Designer sf10
The Simple / / Toadies / / AP 01 Lines Silverlining
Flaming Pear /
/ XE Xtras
Mura's Samless /
/ Medhy /
/ Mura's Meister
Adjust Variation /
/ AAA Frame / Photo Frame
Cores usadas
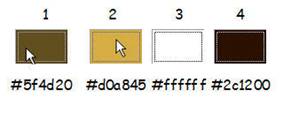
Foreground color # 5f4d20 / / Background # d0a845
Forme um gradiente

1
Abra alpha_hania Duplicatee feche a originaloriginal
Rename "Background"
Pinte com o gradient
Adjust> Blur> Gaussian Blur> Radius 25
Plugin L & K> Elvida

Edge Effects> Increase
Plugin Unlimited> BKG Kaleidoscope> Kaleidoscope Persian

Simple Plugin> Half Wrap
2
Layers> Duplicate
Resize to 80%
Effects of image> Seamless Tiling> Default
Opacidade 65
3
Select> Load Selection from Alpha Channel> Sel_1

Selections> Promote Selection to Layer
3D Effects Drop Shadow 0/0/30/40 preto
selection one
Toadies Plugin> What are you default
Effect Edge enhance
3D Effects Drop Shadow 10/10/50/5 black
Blend Mode> Screen
4
Ative Background layer
Select> Load Selection from Alpha Channel> Sel_2

Selections> Promote Selection to Layer
Selection none
Distortion Effects> Polar Coordinates

Layers> Arrange> Move Up
Blend Mode> Darken
Set the Opacity to 50
Toadies Plugin> What are you default
5

Layers> Merge Visible
6
Layers> New Layer
Pinte com o gradient
Adjust> Blur> Gaussian Blur> Radius 25
Layers> Arrange> Move Down
Ative top layer
Resize to 80%
Plugin BKG Designer sf10 I> Right Corner Wrap

Blend Mode> Overlay
Plugin AP01 Lines Silverlining> Dotty Grid

Geometric Effects> Cylinder Oizzontale

Plugin Flaming Pear> Make Cube Tile
Edge Effects>Enhance
7
Ative Raster 1
Plugin XE Xtras / elemental

8
Layers> New Layer
Selections> Select all
Open the tube Aclis Paisje _03_27_11_2012
Copy and paste into selection
Opacity to 40
Selection none
9
Ative a layer do topo
Layers> New Layer
branco no background color
Select> Load Selection from Alpha Channel> Sel_3
Pinte de branco
selection none
Unlimited Plugins> Mura's Seamless> Shift wave

Set the Opacity to 60
Blend Mode> Overlay
Adjust> Sharpness> Sharpen
Effects of Texture> Veneziana

Layers> Arrange> Move Down
10

Layers> Merge Visible
11
Layers> Duplicate
Resize to 75%
Effects image> Offset

Selections> Select all
Select>Float
Select Dfloat
Layers> New Layer
Background color # d0a845
Pinte a selection com a cor do background
Select> Modify> Contract by 3 pixels.
Aperte delete
selection none
Layers> Merge Down
3D Effects Drop Shadow 0/0/100/40 preto
12
Ative sua primeira layer
Layers> Duplicate
Plugin Medhy> Sorting Tiles

Plugin Mura's Meister> Perspective Tiling

3D Effects Drop Shadow 0/0/100/40 black
13
Ative a background layer
Adjust> Blur> Gaussian Blur> Radius 15
Plugin Medhi> Sorting Tile

Effects of image> Seamless Tiling

Edge Effects> Enhance More
14
Ative a layer do topo

Layers> Duplicate
Effects of image> Seamless Tiling

Layers> Arrange> Move Down
Distortion Effects> Wind

Blend Mode> Multiply
Edge Effects> Increase
Opacidade 76
15
Ative a layer do topo
Abra déco_1
Copy and paste as a new layer
Effects of image> Offset

Layers> Duplicate
Distortion Effects> Wind 100 from right to left and then 100
Edge Effects> Increase
16

Layers> Merge Visible
17
Select> Load Selection from Alpha Channel> Sel_4

Selections> Promote Selection to Layer
3D Effects Drop Shadow 0/0/50/40 black
Plugin Simple> Pizza Slice Mirror
Layers> New Layer
Pinte color # 2c1200
Select> Modify> Contract 4 px.
Delete
Selection none
Layers> Merge Down
Layers> Duplicate
Image> Flip
Layers> Merge Down
Plugin Adjust> Variations
Click no e Original e 1 vez 2 vezes no Darken
18
Pen Tool Size 5> Line Cre @ L05

Color # 2c1200
veja

Layers> Convert to Raster Layer
Magic Wand tool
Select a line
Select> Modify> Contract 4 px.
Layers> New Layer
Pinte color # d0a845
Plugin Eye Candy 5 Impact> Glass
Aplique Preset Clear
selection none
Layers> Merge Down
3D Effects Drop Shadow -4/3/50/5 preto
Layers> Duplicate
Image> Flip
Layers> Merge Down
19
Layers> New Layer
Select> Load Selection from Alpha Channel> Sel_5

Pinte color # 2c1200
Plugin Eye Candy Impact> Glass

Selection none
3D Effects Drop Shadow as before
Layers> Duplicate
Image> Flip
Layers> Duplicate
Image> Flip
Effects of image> Offset

Layers> Duplicate
Image> Flip
Layers> Merge Down 3 vezes
20
Ative background layer
Plugin AAA Frames> Photo frame

Layers> Merge Visible
21
Layers> New Layer
Select> Load Selection from Alpha Channel> Sel_6

Pinte color # 2c1200
Select> Modify> Contract by 5 px.
Press the Delete key on the keyboard
Select> Modify> Contract by 10 px.
Fill with color # 2c1200
Plugin Eye Candy Impact> Glass
selection none
3D Effects Drop Shadow -4/3/50/5 preto
22
abra vase_blé
Copy and paste as a new layer
Resize to 50%
Adjust> Sharpness> Unsharp Mask

Plugin Eye Candy Impact / perspective shadow
Apply the preset reflect_front_Créaline9.11.2012
Layers> Merge Visible
23
Add border 2 px. color # 2c1200
Edit> Copy
Add border 45 px. color # d0a845
Select the border with your magic wand
Edit> Paste into selection
Adjust> Blur> Gaussian Blur> Radius 15
Effects of Texture> Weave

Select> Invert
3D Effects Drop Shadow 0/0/100/40 black
selection none
24
Open the tube woman_578 CREALINE
Copy and paste as a new layer
Resize to 80%
Plugin Eye Candy Impact> Perspective Shadow
Add border 2 px. color # 2c1200
Assine
Save as. Jpg
Nenhum comentário:
Postar um comentário